


Home > general information > Tips and Guides > Technical guides > Generalists >
How to control and maintain your lighting?
Have a headlight with a LED bulb very enlightening, that's good. Having lights in good condition is even better. Still on the "See and be seen" principle, here are some tips for effectively controlling and maintaining your lighting.
Systematic control
- Check the cleanliness of the optics
- Turn ignition on
- Ensure that the position light and the dashboard lighting are working properly
- Check that the dipped and main beam headlights are working properly, as well as the main beam warning light
- Check that the high beam call and the high beam call warning light are working correctly
A few tips as well:
Do not put your fingers on the headlight bulb (for halogen in particular).
For change the bulb, it's sometimes complicated car you have to disassemble part of the fairing. On the roadsters it's simpler car accessible.
Also pay attention to the cleanliness of the optics which can both reduce the range of lighting by 35% after having driven only 30 mn in the rain, but also dazzle oncoming drivers.
Most often par pure negligence, conscious or not, some drivers drive without headlights or taillights. This proportion is higher on small and medium displacement machines (50 and 125) but 10 to 20 percent of the big cube motorcycles also sometimes or often run with a failing light. This proportion is higher in town than on the road.
Check your lights every time you ride!
While you're warming up the engine at a standstill before you go, while you're putting on helmet and gloves : Instead of standing next to the motorcycle, walk around it to take a look at the front and rear lights.
Did you forget to do this? During your journey, look to see if you see the reflection of your headlight in the window or the body of the vehicle in front of you.
You have a doubt? When stopping at a stop sign or at a light, put your hand in front of the light… And for the rear light, just think about it on arrival, before switching off the ignition !
The procedure for checking your lighting is very simple, those who passed their license before 2020 know it or have at least vague memories of it, here are the elements to check:
- Dipped beam (code)
- Headlight call
- High beam (full headlights)
- Front and rear indicators
- Rear position light
- Brake light with front brake and rear brake
- Possibly the horn
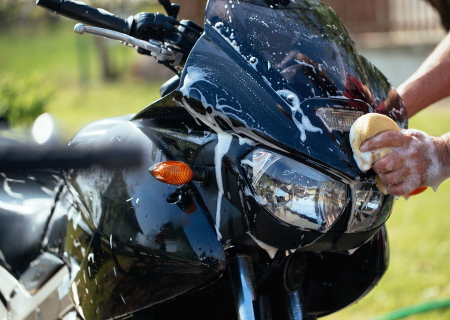
Clean and renovate your headlight optics
It is strongly recommended to regularly clean your headlight optics. Indeed, there are many insects, impacts of mud and dust that may cloud your optics and make your lighting much less efficient.
A dirty optic is 30 to 50 % of emitted luminosity lost. In addition, grime prevents heat dispersion, which significantly degrades the longevity of the bulbs.
During long journeys, it is recommended to give a small cleaning blow at each break.
Time, climate and UV contribute daily to the aging of your headlight lenses which, as they oxidize, lose their transparency.
Beyond the aesthetic aspect, you put yourself in danger by losing lighting capacity. There are headlight optics restorers. These high-performance products eliminate micro-scratches, restore transparency, clarity and shine to optics. These products generally apply without dismantling. Their deoxidizing and non-abrasive properties make them the ideal solution to restore shine and transparency to your headlights without having to replace them.
Headlight adjustment
Your motorcycle manual contains the explanations necessary for adjusting your headlights, namely the location of the screws and the role of each of them.
The headlights of a motorcycle can be out of adjustment in two ways:
-If your beam does not illuminate high enough, you do not have sufficient visibility
- If your beam shines too high, you endanger others by dazzling them
The adjustment must be made in principle together so that one of the two people gets on the bike and we get closer to real driving conditions. Setting up only takes a few minutes.
Before moving on to adjusting your headlights, we advise you to equip yourself with the following equipment:
- A Phillips screwdriver to act on the screws and orient the headlight
- A tape measure that will allow you to accurately calculate the different distances
- A pencil that will allow you to tracer the marks on the wall
Also plan a spanner, pipe or ratchet with sockets if you have a motorcycle with fairing or equipped with a fork crown
It is imperative to ensure that the height of the headlight is appropriate and that it illuminates well in front. The headlight must not project its light onto surrounding objects (bitumen, tree, sidewalk...).
Recent motorcycles have screws located around the headlight. To adjust:
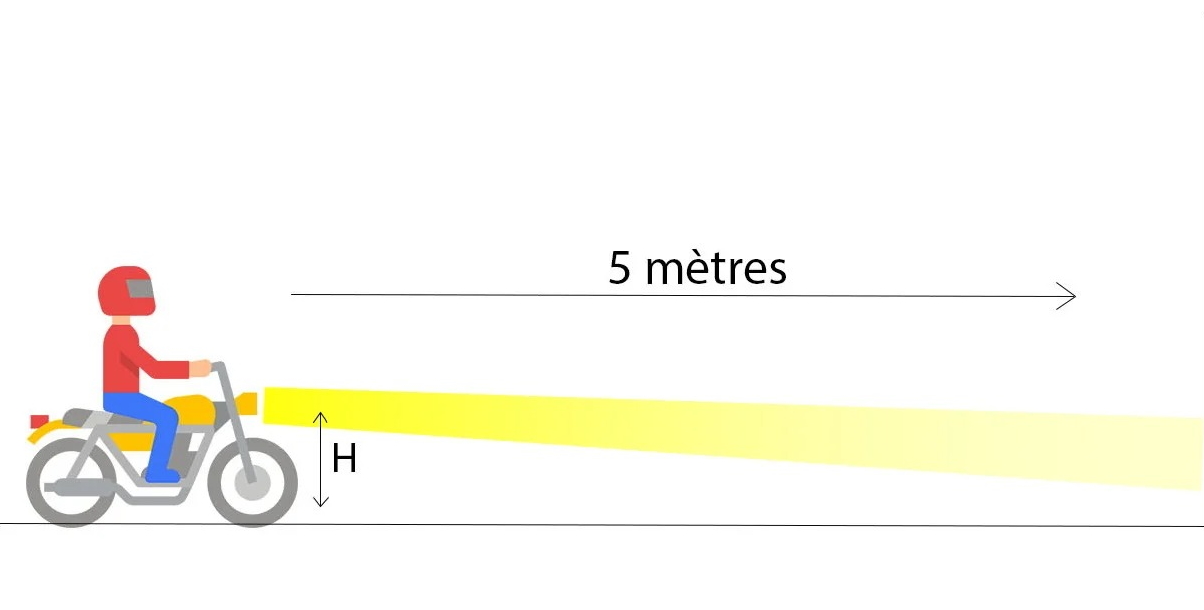
- Place the motorcycle stationary and not kicked off at a distance of 5 meters from a wall then get on the motorcycle.
- Measure the distance between the middle of the headlight and the ground.
- Measure the vertical distance between the upper limit of the beam and the ground. Spot par a Trace on the ground and compared with the previous distance. The upper limit must be below the strip drawn from -5 to -15 cm
If there is no match, reposition the headlight using the screws that hold it.
The different types of adjustment
- For side adjustment: the motorcycle must be exactly perpendicular to the wall and the beam emitted par the headlight must be positioned at the intersection of the light beam with the horizontal line drawn on the wall.
- For an old motorcycle: the headlight must be adjusted by hand. To adjust it you have to unscrew the headlight slightly then orient it as it should before tightening the screws properly.
- For motorcycles with fairing: It is necessary to act on the knob to adjust the headlight as it should. Loosen the side fixings of the headlight and adjust the height by lowering or raising it (some models have a height adjustment screw located below or on the side) . To modify the adjustment of the headlight, use the appropriate tool to act on the knob (it is sometimes a Phillips screwdriver or a spanner). Loosen or tighten until the correct adjustment is achieved.
![]() Cart
Cart

This product has been added to your cart
![]() Cart
Cart
You have already added this product to the cart or there is not enough in stock.