


Home > general information > Tips and Guides > Technical guides > Motorcycle All Terrain
HOW TO REPLACE THE HOUSSE IN THE SADDLE OF HIS OFF-ROAD MOTORCYCLE?
Whether it is to replace a worn, damaged seat cover, the victim of degradation or a bad tear, you will sooner or later have to replace the seat cover of your vehicle.
There are 2 types of saddle covers on the market:
The non-slip cover: Coming out of turns when opening the throttle, it's important to have a seat cover that gives you maximum grip so you don't slip. This is why some covers are called non-slip or full traction covers since they have strips on the top.
The customizable saddle cover: if you want to set up a seat cover in order to personalize your motorcycle, it is possible. Original covers are usually black. It is now possible to install covers of different colors to have a factory-style motorcycle.
MATERIALS NEEDED TO REPLACE ITS COVER
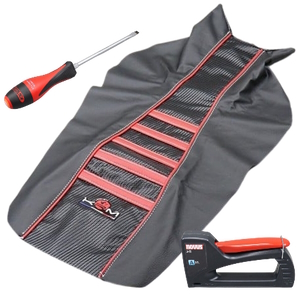
- Stapler
- Cutter
- Hair dryer or heat absorber
A second person. It is optional, but the assembly will be easier. Two extra hands will not be supernumerary.
Count an hour. No haste, this work requires meticulousness and precision.
THE ETAPES AT THE WORKSHOP
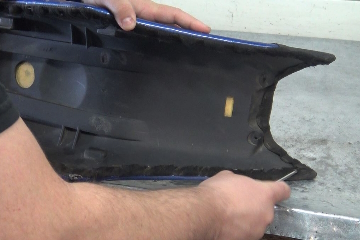
1 – Removing Staples
After thorough cleaning of the bottom of the saddle, lift the clips by levering using the screwdriver. If staples are stubborn, use pliers to remove them.
If your old cover was punctured, check that the foam is not wet. If so, let it dry before reassembly. It is quite possible to install a saddle cover one above the other but that would be less comfortable.
If the foam has lost its firmness and crumbles, the foam will also need to be replaced.

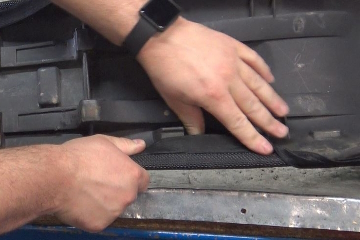
2 – Front Attachment
Put the new cover on the front of the saddle. Center it and place three final staples parallel to each other.
Take your time to properly adjust the cover before stapling.
3 – Rear Placement
The cover should be just stretched so as not to deform the saddle. Too tight, the front of your saddle would no longer stick against the tank and would allow the mud to pass towards the air box. Too loose, it will wrinkle under your buttocks. Also remember to center it before placing three staples as you did for the front.
4 – Elbow Stapling
This is the most delicate operation! The cover must be impeccably stretched at the level of the hollow of the saddle in a symmetrical manner. For that, trust your eye by taking reference marks on the decoration if necessary. It is best to get help to keep the sides folded under the saddle to easily place the clips on the flat bottom of the saddle.
5 – Sidewall stapling
Before stapling the sides, slightly heat the cover which, as it becomes more flexible, will perfectly fit the shape of the saddle
We take care of the two front rows and we end up par the back, always starting from the elbows that you have just fixed going up towards the ends of the saddle. Again, you have to stretch the cover and place it symmetrically. Leave just a few millimeters of space between each staple.
6 – Stapling from the back
A properly fitted seat cover should not show creases at the rear corners. To do this, it is necessary to multiply the small folds under the saddle as much as possible and place staples astride them. The more folds there are, the better the result will be.
7 – Finish
All that remains is to remove the superfluous parts of the edge of the cover with a cutter, in particular where the bottom of the saddle rests against the tank or the rear buckle. No extra thickness should be created at these places. Remove just enough for that, don’t go over the staples.
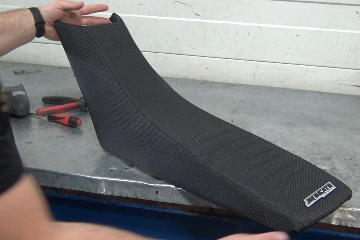
8 - Setting up the saddle.
Pull up your saddle, admire your work.
Our advice
Improper fitting can lead to abnormal or premature deterioration of the saddle cover.
It's best to take the new seat cover out of its packaging two days before fitting it and spread it out in a warm room to smooth out the creases in the packaging.
Check that the staples are not too long. The recommended size is 6 mm, beyond that you risk drilling the seat.
Make sure after a few hours of driving that no creases have formed on the cover. In this case, do not hesitate to tighten the cover.
For washing, use mild soap and water. Rub with a soft cloth or sponge. Do not use chemicals or high-pressure cleaners.
Find the best brands of adaptable saddle covers like Blackbird, Bud Racing, Fifty Units, Gencod, JN Seats,KRM, Polisport, Sella Dala Valle and Tecnosel on our site.
![]() Cart
Cart

This product has been added to your cart
![]() Cart
Cart
You have already added this product to the cart or there is not enough in stock.