


General information > Tips and Guides > Tutorials > 50 with box > Electrics > Test a 5 pin relay
 TUTORIAL FOR TESTING A 5-PIN RELAY
Ce tutorial aims to explain to you how to test a 5 pin relay. THE relay is an electrically operated switch that allows an electrical circuit to control one or more circuits by opening and closing its contacts in response to the coil being turned on or off.
Testing a relay is a relatively simple task that you can do yourself. By following the steps above, you can determine if your motorcycle's relay is working properly or if it needs to be replaced.
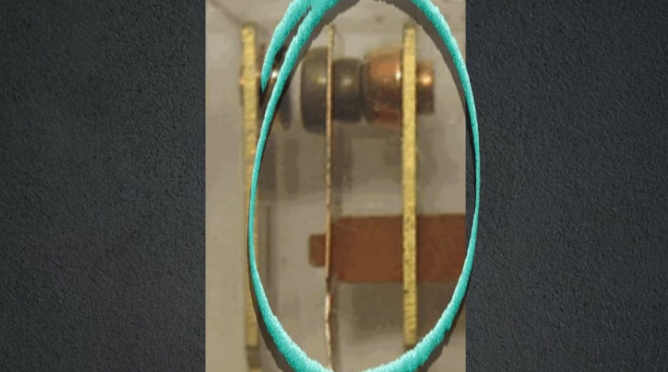
An SP relayDT is made up of 5 pins in total (3 for contacts, 2 for the coil).
Generally reliable, the relay can fail like any mechanical component causing problems with starting, indicators or headlights.
Difficulty :
![]()
Temps necessary:
5 minutes
Necessary material :
HOW TO TEST A 5-PIN RELAY
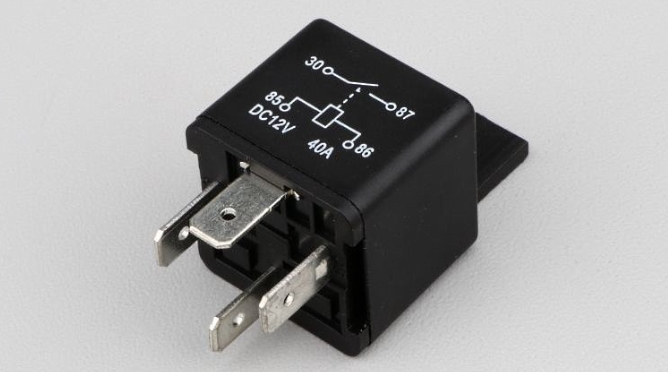
1) The relay is an electrical organ making it possible to distribute power from an order issued par the control part. The relay allows the opening and closing of an electrical circuit.
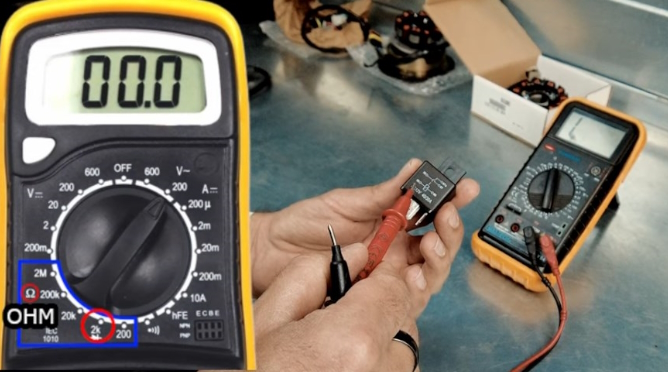
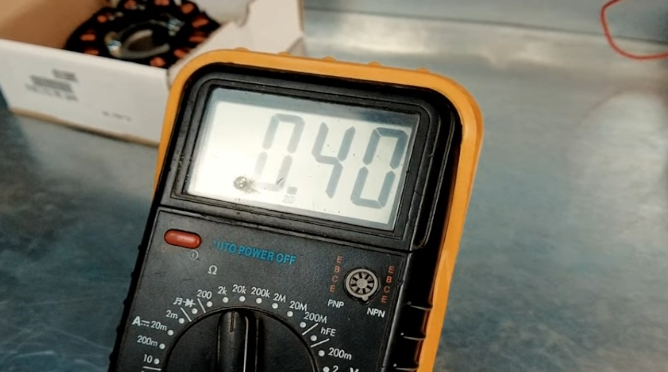
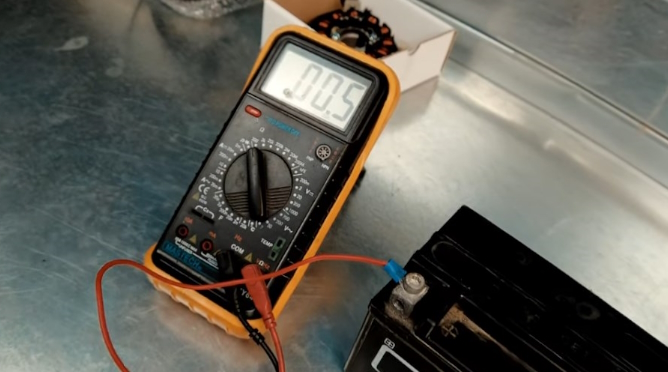
2) Start par Test the relay resistance to check the continuity of the control circuit. Set the multimeter to 2K ohm.
The value obtained must be between 0 and a few ohms. If the resistance is too high or infinite, this indicates that the relay is faulty and needs to be replaced.
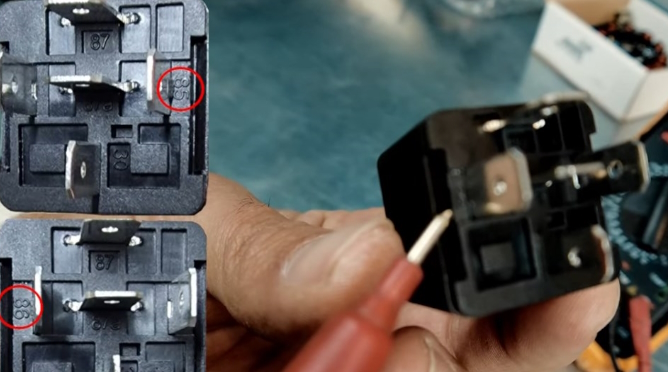
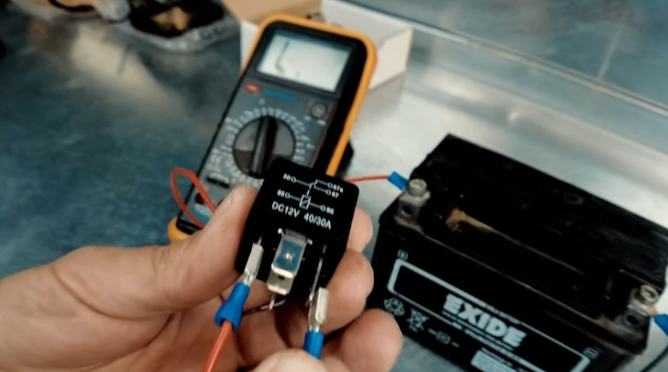
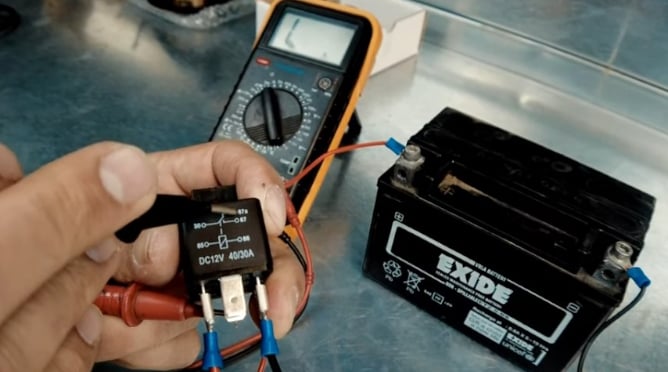
3) Place the probes on pin 85 and pin 86.
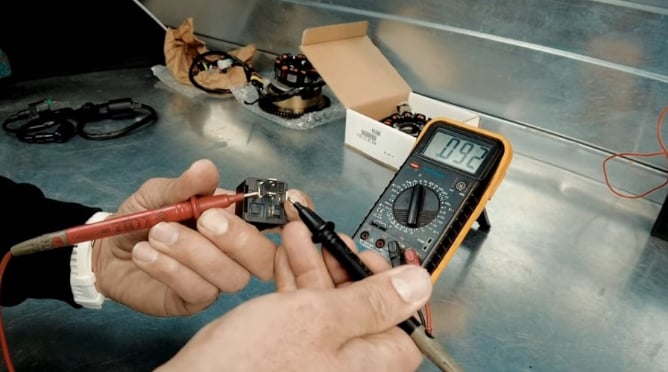
4) If the value displayed on the multimeter is less than or equal to 350 ohms, then the winding is functional.
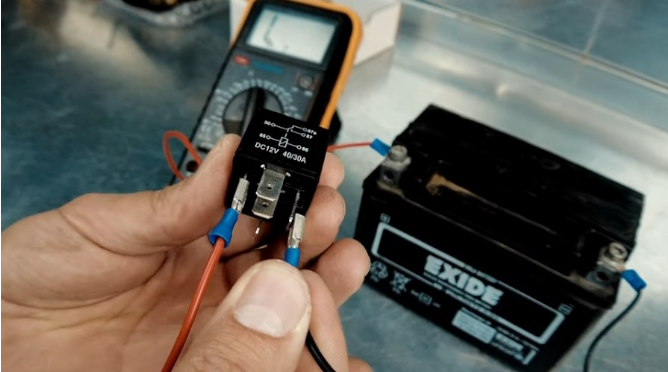
5) Check the continuity of the closed contact.
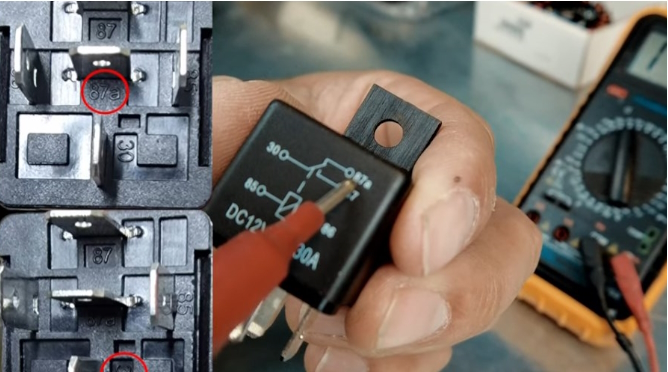
6) Place the probes on pin 3 and pin 87A.
7) If the value displayed is less than or equal to 1 ohms, the contact is functional.

8) Check the continuity of the open contact (so no continuity).
9) The multimeter probes are placed on pin 87 and pin 30. No continuity, which is normal since the contact is open. The open contact works correctly.
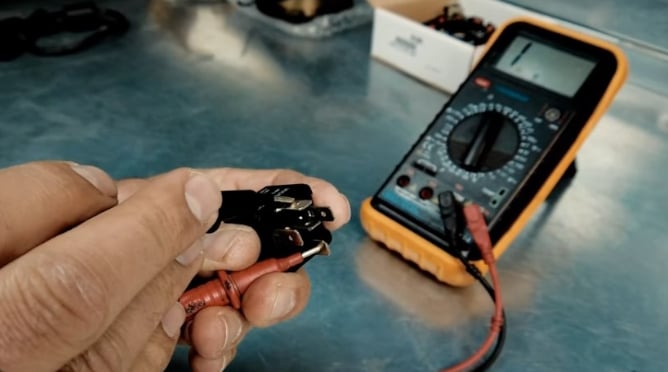
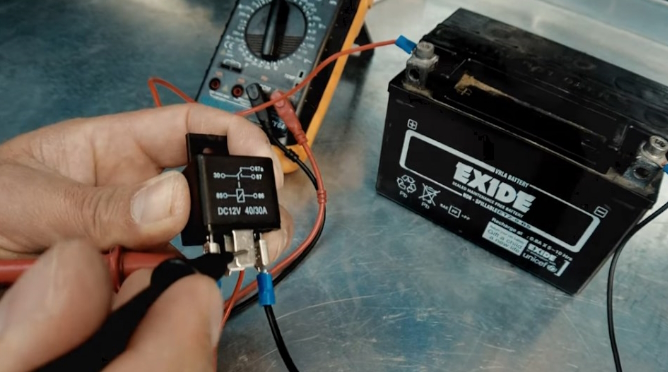
11) Now test the relay with a 12V supply to verify that the relay is correctly receiving the supply voltage.
Connect the battery to the relay by connecting pin 86 and pin 85. Polarity has no effect.
11) The relay clicks. The switch was activated. The winding works correctly.
11) The relay clicks. The switch was activated. The winding works correctly.
11) Check the continuity of contact 2 closed (therefore continuity) by placing the probes on pin 30 and pin 87.
11) If the value displayed on the multimeter is less than or equal to 1 ohm, then the closed contact is functional.
11) Check the continuity of contact 1 open (therefore no continuity) - probes placed on 30 and 87A.
Once the various measurements have been carried out, analyze the results obtained to determine if your relay is in good working order or if it needs to be replaced. If all the measured values comply with the manufacturer's specifications, this means that the relay is working correctly and that your problem may come from another component (starter, battery, wiring, etc. ). On the other hand, if one of the measurements indicates a failure of the relay, it is time to replace it.
Remember to follow the safety instructions when handling the electrical elements of your vehicle, and do not hesitate to call a professional in case doubt about your mechanical skills.
You can find our relay range. Our parts are suitable for your two-wheeler or your quad.
You will find at 50factory.com new or used parts for all makes of two wheels.
VIDEO: TESTING A 5-PIN RELAY
![]() Cart
Cart

This product has been added to your cart
![]() Cart
Cart
You have already added this product to the cart or there is not enough in stock.