


Informations General > Tips and Guides > Tutorials > Bikes
> Cycle parts > Replace the bike saddle
 TUTORIAL FOR REPLACING THE BICYCLE SADDLE
Ce tutorial aims to help you replace the saddle of your bike.
Difficulty :

Temps necessary:
5 minutes
Necessary material :
HOW TO REPLACE YOUR BIKE SADDLE?
You may need to change your bike saddle for several reasons. This may be the case if you realize that it is not adapted to your body shape and that it is not comfortable.
The change of saddle also takes place in the case of a change of practice. You could find yourself in uncomfortable situations with a city bike saddle while you are mountain biking.
You may need to change your saddle when it is worn and no longer meets the comfort criteria.
So, what should alert you are your sensations! Concretely, if you feel that you have to reassemble your saddle in the middle of a ride, it is because it has collapsed and must be replaced.
Consult our technical guides: How to choose the right saddle et Which saddle for which activity?
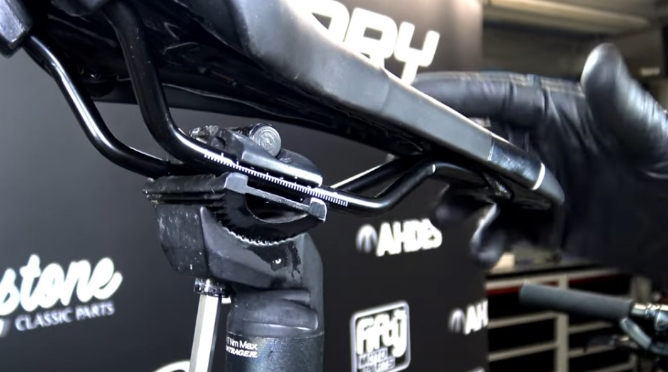
The saddle fixing system is almost universal. The attachment will be done on the two rails found under the saddle. A system of jaws will allow the attachment between the seat post and the saddle.
There are several configurations:
1st configuration: A trolley is directly integrated under the saddle. It is therefore mounted directly on a "raw" seat post, a seat post without a jaw. It is important to carefully check the diameter of the carriage mounting hole.
2st configuration: The saddle is delivered with its two rails only. It is thus fixed on a seat post which is equipped with a carriage and which will tighten the saddle rails. (our example)
3st configuration: The saddle is delivered with its two rails only. It is possible to mount it on a jawless seat post using a mounting cart. The latter will tighten the saddle rails on the one hand and then slip onto the seat post.
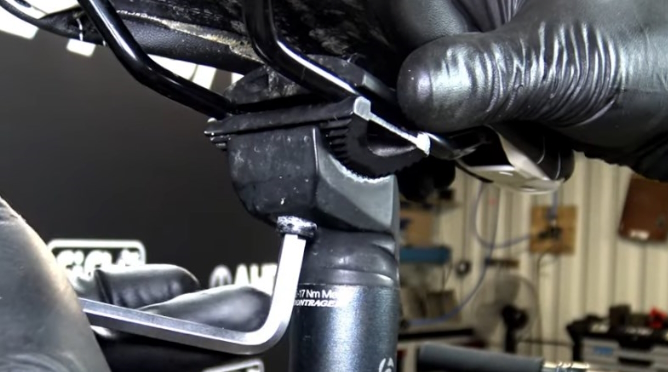
1) After installing your bike on the workshop stand, loosen the tightening screw located under the saddle in order to dismantle the old saddle.
2) Rotate the upper part of the support (jaw) a quarter turn to release the saddle. Clean if necessary.

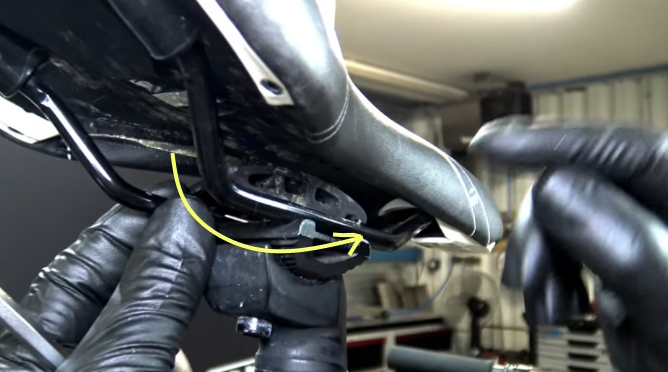
3) Place the new saddle.
4) Rotate the jaw through which the saddle rails will pass a quarter turn.

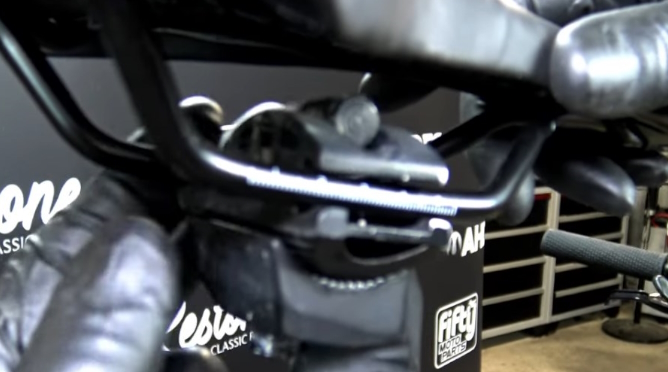
5) Tighten the screw. It is important to lubricate the "mechanical" tightening parts. This will have the effect of avoiding any squeaking. This part is highly exposed to water and salt. So put a little grease in the parts that will grip the saddle carriage, especially if it is made of carbon.
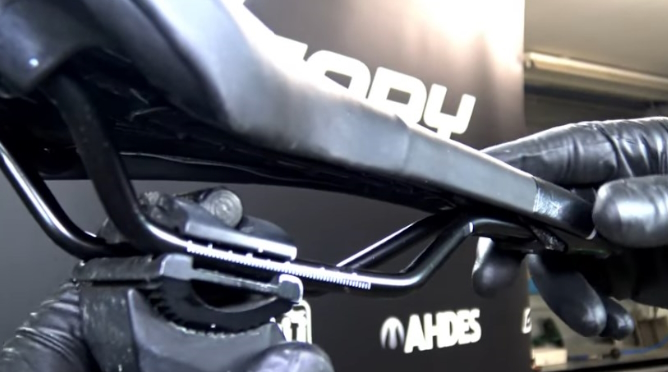
6) You can now proceed with the adjustment. First in depth

7) Then in inclination, some saddles have a scale to help with adjustment.
8) Once the adjustment is made, tighten the nut. Get off the bike and fine-tune the settings.
It is best to make the basic adjustments correctly to feel comfortable in your saddle. Par Afterwards, you can slightly refine the settings.
VIDEO: REPLACING THE BICYCLE SADDLE
![]() Cart
Cart

This product has been added to your cart
![]() Cart
Cart
You have already added this product to the cart or there is not enough in stock.