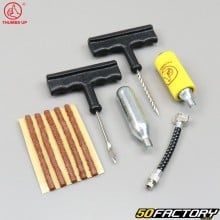
Thumbs Up bike saddle bag (with tubeless tire repair kit with "braid" wicks)
We also recommend
Description
Thumbs Up Tubeless Tire Repair Kit with Saddlebag
Cover containing the tools needed for tubeless repairs on your VTC, VTT (mountain bike), BMX, road, eBike or VAE, gravel, trekking bike... attaches under the saddle of your bike.
This puncture repair kit allows you to seal the puncture area after removing the body.ranger (nail, screw, etc.) from your tire (without removing it) so that you can continue your journey in complete safety without damaging your wheel. For these wicks, we speak of repair par outside, par opposition to reparation par mushroom which is done from the inside of the tire with a patch (removal of the tire necessary).
This kit can be used if the puncture is present on the tread and not on the sidewall of the tire, the puncture diameter must be less than 5 mm and the internal structure of the tire must not be damaged. teriorepar the puncture. It is also necessary that the tire has never run flat and that it has not already undergone a repair before.
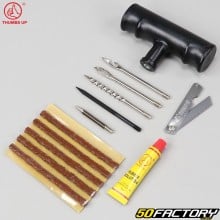
This set includes
- 1 x storage bag
- 1 x drilling tool
- 1 x bit tool
- 2 x 2g CO16 threaded cartridges
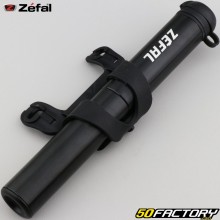
- 1 x pressure regulator
- 1 x blade
- 1 x flexible extension
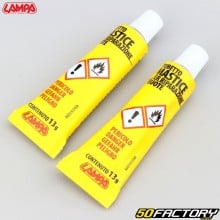
- 1 x tube of dissolving glue 5g
- 3 x wicks (braids) 5 mm x 100 mm
- 5 x wicks (braids) 4 mm x 100 mm
Technical characteristics and dimensions of the under-saddle puncture repair kit
- Brand: ThumbsUp
- Bag color: black
- Saddlebag Height: 70 mm
- Saddlebag Width: 85 mm
- Saddlebag Length: 135 mm
- Attaches to saddle rails
The steps to follow to repair your flat tire (see typical diagram)
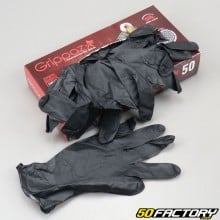
- We advise you to use a pair of gloves when using this kit
- Step 1: Locate the cause of the puncture then remove the body estranger using pliers or pliers.
- Step 2: Push the drill tool into the hole and shape the hole par a back-and-forth movement.
- Step 3: Grasp a wick using pliers (be careful of the glue), then insert the wick halfway into the needle of the tool.
- Step 4: Press the drill bit into the hole in the tire using the tool, while performing a right/left twisting motion. Continue until the ends of the wick no longer stick out more than 2 inches.
- Step 5: Place the wick in the tire by turning the tool a quarter turn then, pull the tool out sharply.
- Step 6: Cut the ends of the wick to 3 mm from the tire and re-inflate it.
- Once repaired, be sure to check and readjust your tire pressure.
Dangerous. Respect the precautions for use. All liquids and chemicals must not come into contact with skin, eyes and must not be ingested. When handling them, protect yourself with personal protective equipment (EPI).
Safety Information: All liquids should be kept out of the reach of children. DANGER, corrosive product. In case of eye contact, flush immediately with plenty of water for 10 minutes. If irritation persists, seek medical attention. If swallowed, seek medical advice immediately and show this container or the label.
All products in aerosol form must be kept out of the reach of children. Extremely flammable aerosol. Pressurized container: may burst if heated. May cause damage to organs through prolonged or repeated exposure. Causes skin irritation. Causes serious eye irritation. May cause drowsiness or dizziness. May be fatal if swallowed and enters airways. In case of consultation with a doctor, keep the container or the label available.
Products already seen
- IN STOCK28,80 €


 Delivery possible on Thursday 24 July
 Delivery possible on Saturday 26 July


